
Early access · Release date: February 5, 2026
UpdatedMENACE Yaz Build: Perks, Weapons, and Assault Tactics
Build a stronger MENACE Yaz build with Fearsome, Berserk, mobile infantry tactics, weapon picks, and smoke support. Break enemy morale and keep advancing.
Jump to
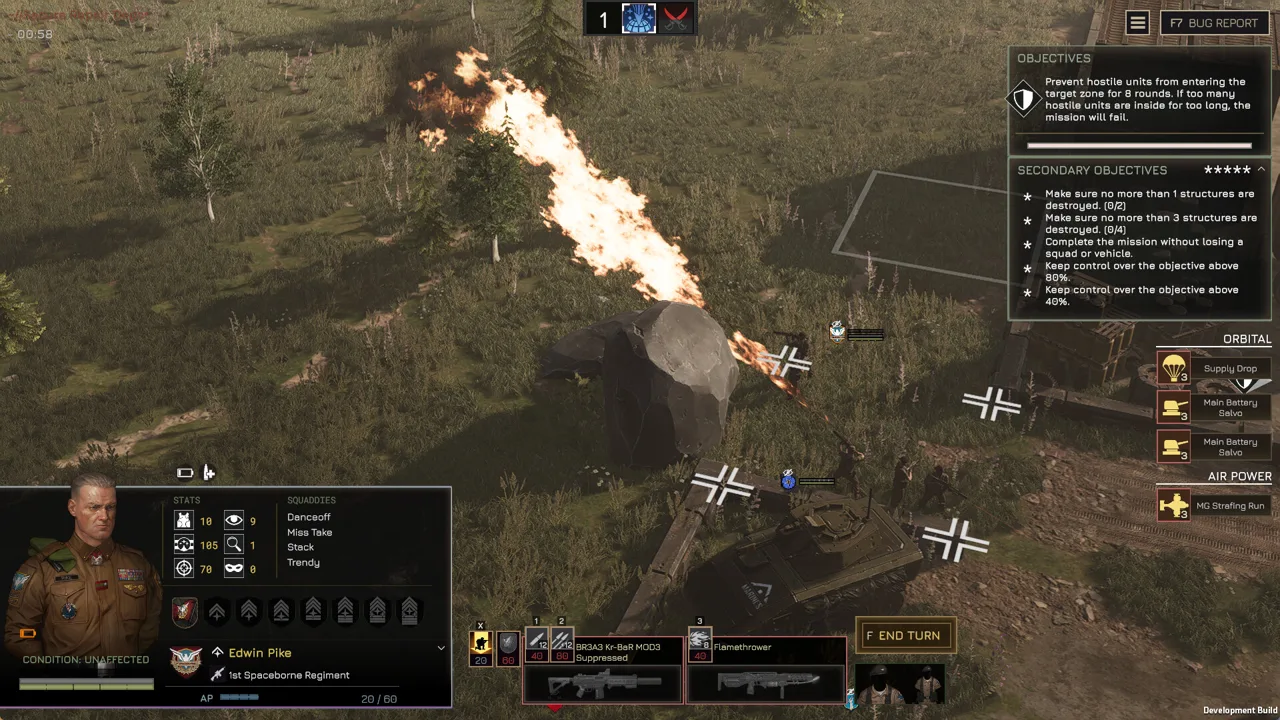
A MENACE Yaz build turns shaken enemies into opportunities to finish a fight. Fearsome helps break their morale, No Mercy rewards you for attacking wavering or fleeing targets, and Berserk feeds action points back into the assault. Shape your MENACE Yaz build around that sequence, then use transport, concealment, or close-range weapons to put him where those advantages matter.
Yaz rewards aggression with preparation behind it. Give him targets that are already under pressure, preserve enough AP to reposition, and bring smoke before committing to an exposed flank.
Core Morale Build: Fearsome, No Mercy, and Berserk
Yaz’s defining mechanic is No Mercy: +50% accuracy and +30% damage against wavering or fleeing enemies. Those bonuses make enemy morale a targeting consideration, rather than just a welcome side effect of shooting.
Fearsome strengthens that identity by increasing the morale impact of his attacks by 100%. Together, the two perks support a straightforward rhythm: inflict pressure, watch for a morale break, and capitalize before changing targets.
| Skill or ability | Effect | How to use it |
|---|---|---|
| No Mercy | +50% accuracy and +30% damage against wavering or fleeing enemies | Prioritize targets displaying either morale state |
| Fearsome | Attacks have 100% greater morale impact | Use weapon attacks to help push susceptible enemies toward a break |
| Berserk | Returns AP after a kill | Pursue achievable kills that leave room for another action |
| Finisher | Adds accuracy and damage against enemies already suffering | Build further into Yaz’s cleanup role |
| Unique recovery ability | Costs 0 AP, has two uses per battle, restores 25% weapon ammunition with a minimum of one, reduces suppression by 33%, and heals one squaddie | Use its ammunition, suppression, and healing benefits during an assault |
Make Fearsome an early priority, then pursue Berserk when available. Add Finisher to reinforce the same target selection. Take Yaz’s recovery ability along the way rather than spending every promotion on damage.
That recovery ability heals a squaddie; it does not revive one. Its zero-AP cost also means you can use it without spending the AP reserved for firing or movement. Check ammunition and suppression before launching another attack.
For this MENACE Yaz build, choose targets by their current condition. A wavering enemy offers No Mercy bonuses immediately. An untouched opponent still needs preparation, even if it is closer.
Avoid confusing suppression with morale. A pinned enemy and a wavering enemy present different opportunities; check for wavering or fleeing before counting on No Mercy.
Construct enemies do not suffer morale states, removing this build’s defining interaction. Against them, emphasize weapon penetration, direct damage, and support from the rest of your force.
Official page: MENACE (menacegame.com)
Mobile Infantry Build: Dismount and Finish the Fight
Build Yaz as mobile infantry when you want him attacking alongside a transport. This setup combines his morale pressure with aggressive positioning, letting him move into a fight and exploit enemies your other units have softened.
 Image: menacegame.com
Choose Mobile Infantry, retain the Fearsome–Berserk core, and add Counterstrike for situations where Yaz remains exposed after attacking. Keep Finisher in the plan so his positioning serves his damage bonuses.
| Build component | Selection | Practical purpose |
|---|---|---|
| Mobility perk | Mobile Infantry | Supports fighting alongside a transport |
| Offensive core | Fearsome, Berserk, Finisher | Combines morale pressure, finishing damage, and AP recovery |
| Retaliation perk | Counterstrike | Returns squad-weapon fire when attacked |
| Early squad weapon | R10A6 K-PAC | Offers an assault-rifle option with three-shot volleys |
| Later weapon option | R228A1 MRS | Hits hard and has an optimal accuracy range of four tiles |
| Accessories | Smoke Grenades and ammunition pouches | Support repositioning and sustained weapon use |
The R10A6 K-PAC gives this MENACE Yaz build a practical starting weapon. Its three-shot volleys suit the emphasis on repeated hits and morale pressure, while its assault-rifle role keeps Yaz useful beyond immediate close combat.
Switch to the R228A1 MRS when it becomes available later in the campaign. Its four-tile optimal accuracy range fits an aggressive dismounting role. Move into that range when the approach is protected rather than spending movement solely to reach it.
Work through each engagement deliberately:
- Identify a target and check its morale state.
- Use supporting fire to damage or pressure it.
- Position Yaz for an attack without leaving him isolated.
- Take the kill opportunity and reassess his AP after Berserk triggers.
- Spend the remaining AP on another worthwhile attack or safer positioning.
Counterstrike adds retaliation, but it does not make exposure harmless. Against melee attacks, it can fire before the enemy completes its attack. Use that interaction as protection against an approaching threat; avoid inviting several enemies to attack just to generate return fire.
Leave the infantry special weapon slot empty when you want Yaz focused entirely on squad-weapon attacks. Keep dedicated anti-armor support elsewhere in your force instead of expecting this assault setup to solve every encounter.
Concealed Flanker Build: Commando, Smoke, and Rifles
A concealed MENACE Yaz build approaches the same finishing role from a different angle. Instead of remaining beside a transport, send him around a flank with concealment gear and smoke, then attack when an enemy is vulnerable.

Take Commando alongside the core offensive perks. In v0.7.16, Commando gained an additional +1 concealment and a movement-cost reduction of two AP per tile while isolated. That update also established a minimum movement cost of four AP per tile, so movement reductions still have a floor.
| Build component | Selection | Relevant mechanic |
|---|---|---|
| Flanking perk | Commando | Adds concealment and reduces movement cost while isolated |
| Armor | Jaeger Fatigues | Supports a concealment-focused loadout |
| Suppressed weapon option | BR3A3 Kr-BaR MOD3 Suppressed | Provides a suppressed squad-weapon choice |
| Accessory | Camouflage Kit | Increases concealment |
| Accessory | Smoke Grenades | Blocks enemy vision, with marked targets remaining an exception |
| Sustained-fire accessory | Ammunition pouches | Extends squad-weapon ammunition availability |
Unsuppressed firing nullifies concealment for one turn. Plan the aftermath before firing: locate cover, consider enemy sightlines, and preserve an exit rather than assuming the armor will keep Yaz hidden after an attack.
Choose a suppressed weapon when maintaining concealment is central to your approach. Use an unsuppressed assault rifle when you prefer its firing characteristics, but support the attack with smoke and positioning.
Advance cautiously around unexplored ground. Leave AP to fall back, and check whether Yaz is spotted before committing. The crossed-eye icon indicates an unspotted unit.
Smoke needs the same attention. Enemies can fire into smoke when targeting a marked unit, so inspect Yaz’s status before relying on it to protect him.
For this MENACE Yaz build, coordinate the flank with the main force. Pressure enemies from the front, then attack a wavering or fleeing target from Yaz’s position. Avoid opening an unrelated fight simply because the flank offers an available shot.
The balancing update also imposed a −60% accuracy penalty on blind fire into a tile. Seek vision and a clear target instead of firing at a suspected position.
Close Assault Build: SMGs, Armor, and Close & Personal
Choose close assault when you want Yaz fighting within four tiles, where SMGs and shotguns operate. Add Close & Personal for its accuracy boost at melee range, then retain Fearsome and Berserk to connect close-range damage with morale pressure and follow-up actions.
| Build component | Selection | Role in the loadout |
|---|---|---|
| Close-range perk | Close & Personal | Improves accuracy at melee range |
| Squad weapon | Kruger CTMP 45 | Provides an SMG option for close combat |
| Alternative squad weapon | MP3A9 PPP “Hi-Cap” | Offers another close-range, high-rate-of-fire option |
| Armor | Boarding Commando Armor | Combines heavy protection with a jetpack |
| Essential support | Smoke Grenades | Helps cover the approach and disengagement |
| Optional accessory | WARD - Wearable Advanced Resolve Device | Grants discipline and detection bonuses |
Close-range fighting exposes Yaz to more accurate enemy fire. Bring smoke support and check the approach before spending AP on movement.
Use a covered assault sequence:
- Place smoke to obstruct enemy vision.
- Move into it while preserving AP for necessary actions.
- Attack from the smoke on the following turn when the target and approach favor Yaz.
- Reassess enemy positions before extending the push.
Keep marked-target exceptions in mind throughout that sequence. Smoke supports the attack; it does not remove the need to inspect threats.
Boarding Commando Armor provides a jetpack with six uses per mission. Reserve those uses for movement that meaningfully changes the engagement. Its cost and the slower movement associated with heavy armor also deserve attention during mission preparation.
The v0.7.16 balance changes improved several weapons relevant to this MENACE Yaz build. Kruger CTMP 45 damage increased from 18 to 25, armor durability damage rose from 18 to 22, and supply cost fell from 20 to 18. The MP3A9 PPP “Hi-Cap” gained armor durability damage, increasing from 9 to 11, while supply cost dropped from 13 to 11.
Match the weapon to the opposition. SMGs offer substantial close-range firepower, but heavily armored targets still demand appropriate penetration or anti-armor support.
WARD provides another equipment decision. In v0.7.16, its discipline bonus increased to 20, it gained +2 detection, and its supply cost fell to 15. Choose it when you want those benefits rather than automatically filling every accessory choice with ammunition.
Finally, pair Yaz with Pike when suppression repeatedly interrupts your assault. Pike can transfer AP and use Rally to reduce suppression. Time Rally after nearby threatening enemies have acted so the recovered squad does not immediately get pinned again.
When rebuilding an existing save, reassign promotions before deploying: v0.7.16 refunded promotion points across the roster. Hotfix v0.7.17 subsequently restored Zig-Zag to Lim by replacing Solid Grouping; that change applies to Lim.
FAQ
What is the main perk combination for a MENACE Yaz build?
Build around Fearsome, Berserk, and Finisher alongside Yaz’s innate No Mercy. Fearsome increases morale impact, No Mercy boosts attacks against wavering or fleeing enemies, and Berserk returns AP after kills.
Which weapon should Yaz use early?
Choose the R10A6 K-PAC for an assault-rifle setup. Its three-shot volleys support morale pressure. For a dedicated close-assault loadout, consider the MP3A9 PPP “Hi-Cap” instead.
Should Yaz use heavy armor or concealment gear?
Match the armor to your positioning plan. Use Boarding Commando Armor for a protected close-assault setup with jetpack movement. Choose Jaeger Fatigues for a concealed flanker supported by Commando, smoke, and careful firing positions.
Does Yaz’s morale build work against Constructs?
Constructs do not suffer morale states, so Fearsome cannot create wavering or fleeing targets for No Mercy. Bring weapons and supporting units that address their armor and durability, and choose attacks around direct damage rather than morale breaks.
Continue with
 MENACE Jane Darby Build: Stealth, Skills, and LoadoutOptimize a MENACE Jane Darby build with suppressed rifles, scouting perks, and smart gear choices. Plan promotions and adapt to the v0.7.16 balance patch.
More in Builds
MENACE Jean Sy Build: Perks, Gear, and Loot Strategy
Optimize your MENACE Jean Sy build with loot-focused perks, grenade launchers, useful accessories, and updated balance tips for a cheaper, stronger squad.
MENACE Kody Build: Assault, Ambush, and Anti-Tank Tips
Build a MENACE kody build around Guerrilla, Assassin, and Vanguard. Pick weapons, manage suppression, and tailor Kody for assault or anti-tank missions.

MENACE Lim Build: Close-Range Perks, Gear, and Tactics
Make your MENACE Lim build hit harder with close-range weapons, AP-efficient perks, armor, and smoke. Plan your setup around the v0.7.17 Zig-Zag return.
MENACE Perks Guide: Builds, Promotions, and New Changes
Choose MENACE perks for Lim, Pike, Tech, and Rewa with practical build tips, promotion advice, and key changes through the v0.7.17 update. Plan your squad.
Join the community
Official channels for news, updates and player help: